
Leaves on a Horse’s Rump: Why Machine Embroidery and Crochet Don’t Always Mix (and How to Fix It)
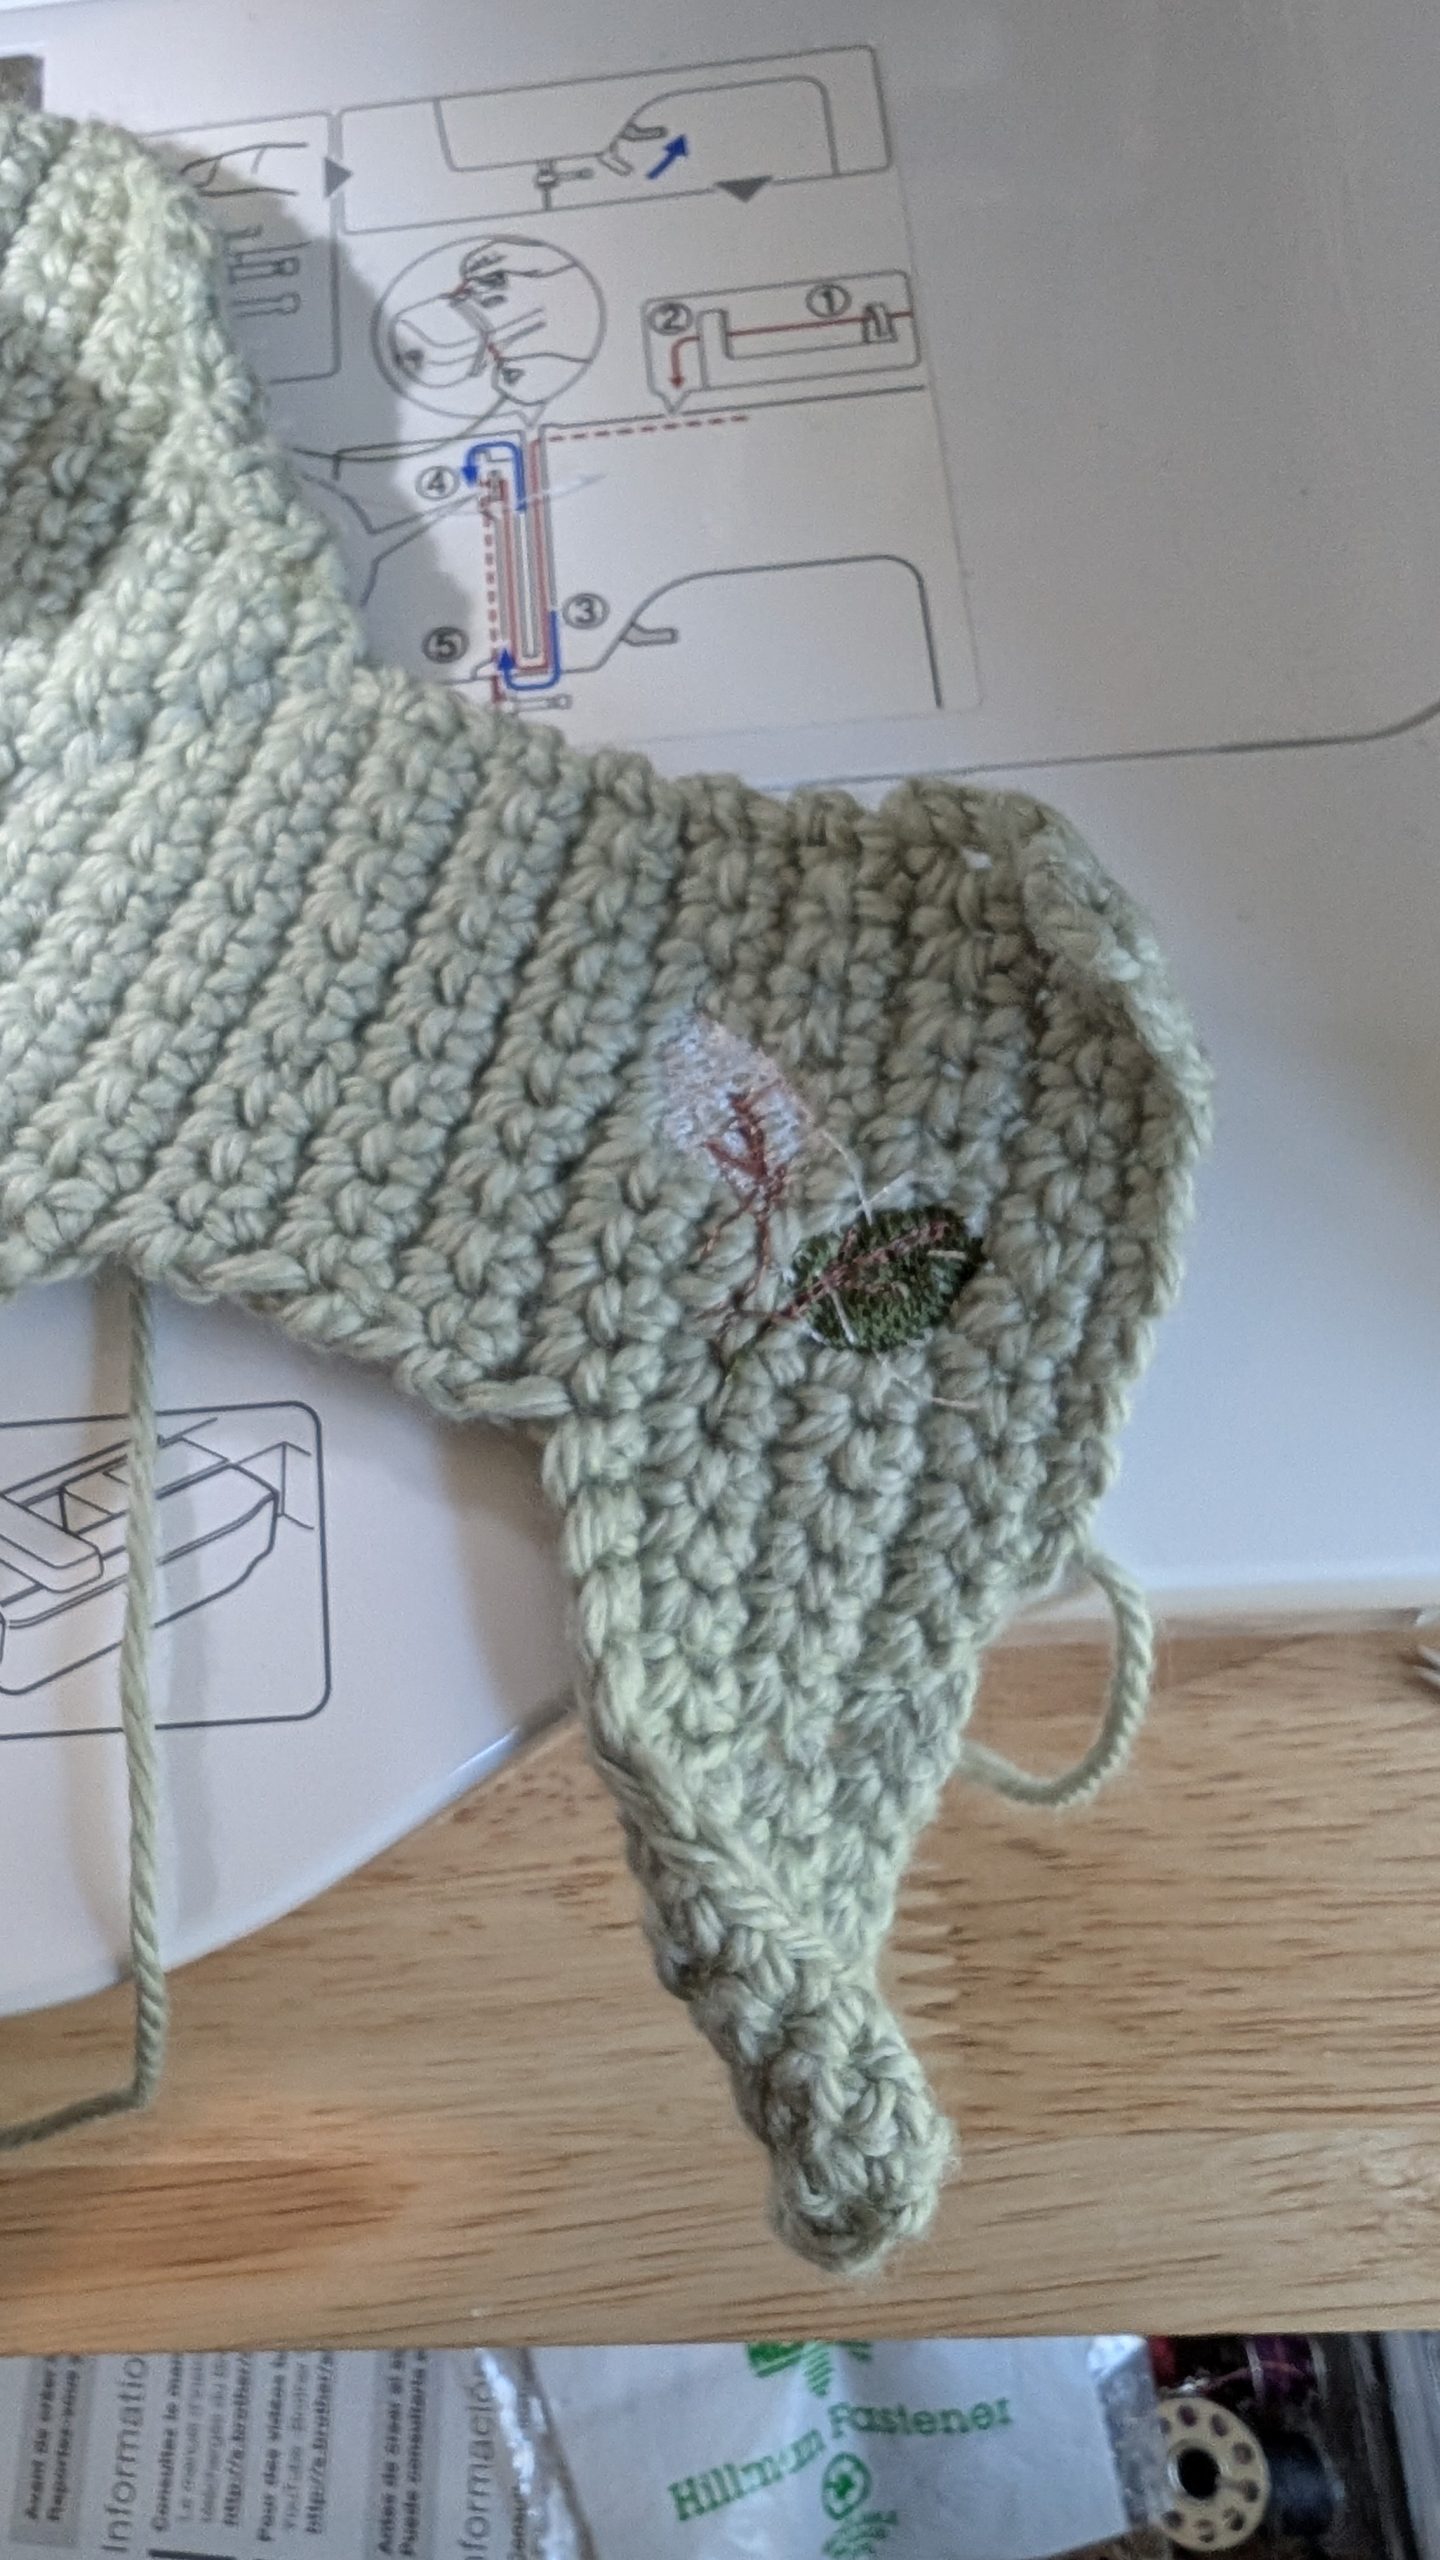
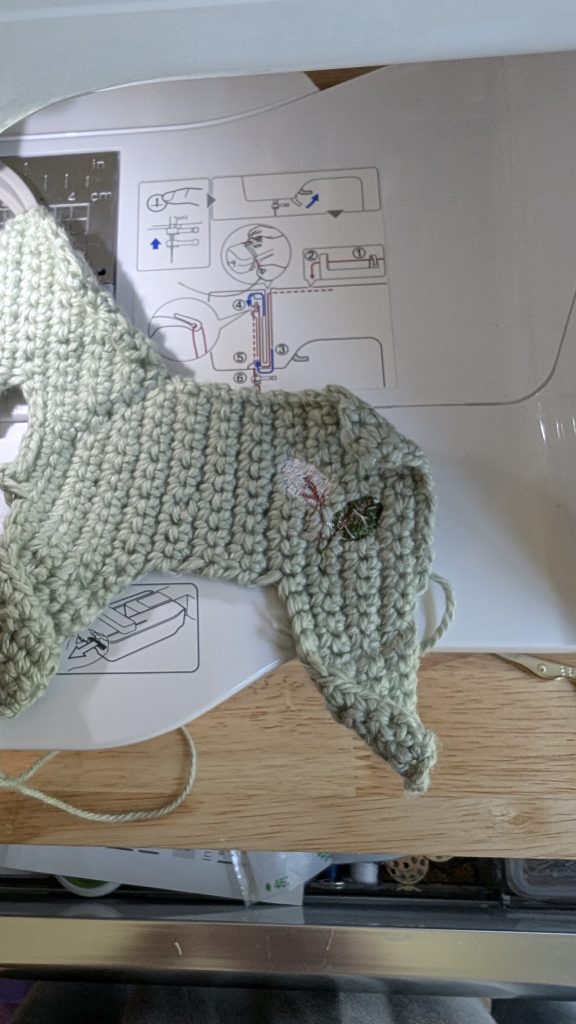
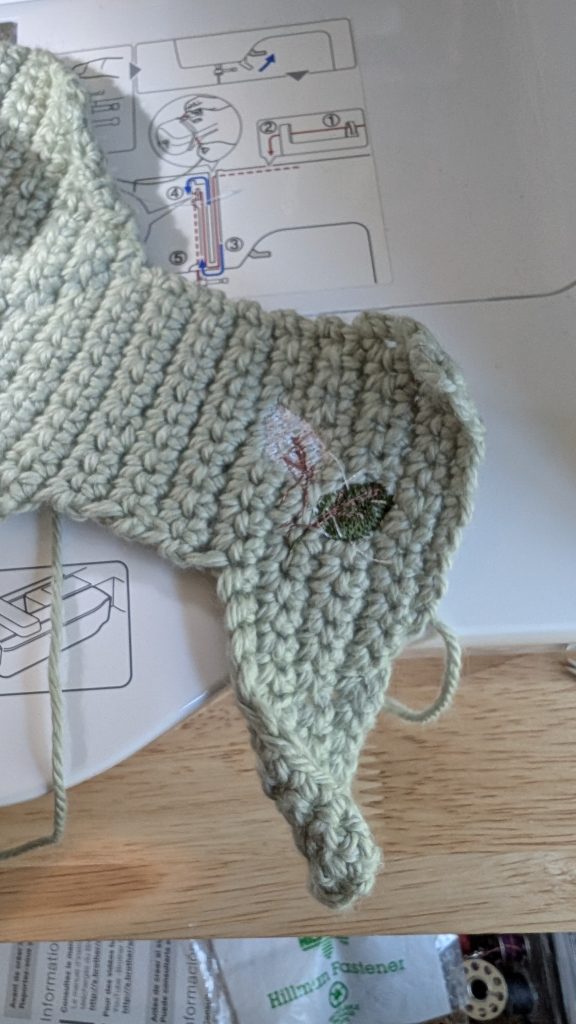
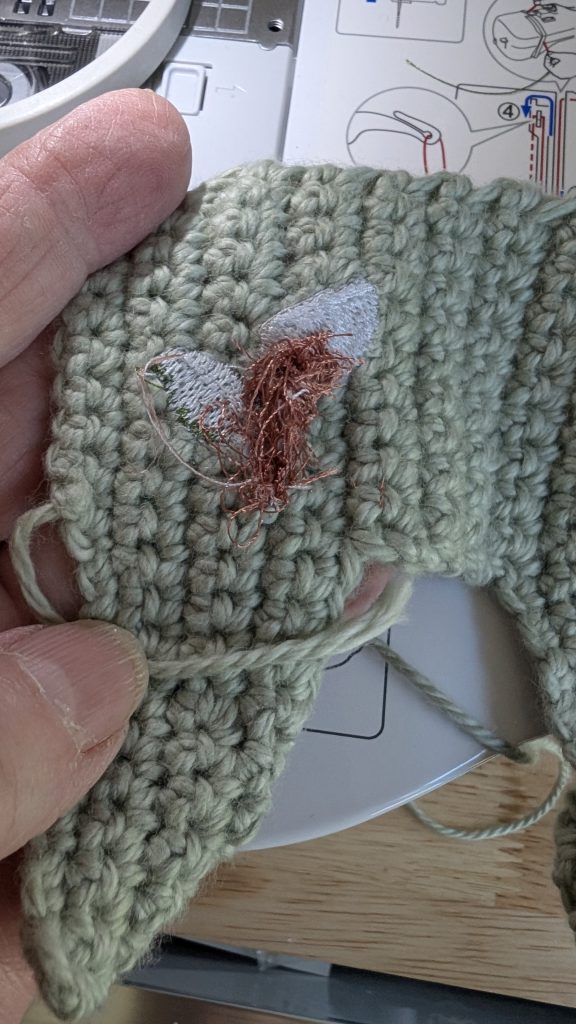
Oh, the classic “bird’s nest” under a beautiful idea! Honestly, when I first tried machine embroidering directly onto crochet, I thought it was a brilliantly brave creative leap, but as you can see from that chaotic tangle of bobbin and top thread on the back, my machine absolutely panicked.
What went wrong? 😾
What went wrong comes down to texture and stability. Machine embroidery requires a tight, uniform, drum-like surface, but our beautiful crochet is full of hills, valleys, and structural gaps. My embroidery needle didn’t just push through fabric; it pushed the stretchy yarn right down into the needle plate, got caught in the gaps, and caused the tension to completely fail, throwing all that extra top thread to the back.
Don’t give up!🐱
You don’t have to give up on adding gorgeous embroidery to your yarn projects, but you do need to approach it a bit differently. First, you must stabilize like your project depends on it because it really does. With stretchy, textured knits or crochet, your stabilizer is the real MVP. You need to sandwich the crochet so the machine only interacts with flat, solid surfaces. For the bottom backing, hoop a firm cut-away stabilizer tightly by itself. Never hoop your crochet piece directly, as it will distort the stitches and stretch out your hard work. Instead, use a temporary fabric adhesive spray or a sticky-backed stabilizer to float your crochet piece right on top of that secured backing. For the top, place a layer of water-soluble stabilizer on top of the crochet. This acts as a smooth bridge, preventing the embroidery foot and needle from diving into the crochet stitches or snagging the yarn loops, and it washes right away when you are finished.
Tailor your machine!🧵
Next, you need to tailor your machine settings to handle this thickness. On my Brother SE700, I always swap to a ballpoint or stretch needle, usually a 75/11 or 80/12. A sharp embroidery needle will pierce and split your yarn, causing fraying, whereas a ballpoint needle gently pushes between the crochet loops. If your machine allows you to limit the maximum embroidery speed, drop it all the way down because intricate, dense fills moving at high speeds on an uneven surface are a recipe for tension disasters. If your top dial is around a standard 4, that is normally fine, but when a machine nests like this, it is often because the top thread missed a tension disk or got pulled out when the yarn shifted. I highly recommend always re-threading the top with the presser foot up to ensure it seats correctly.
Design is everything!🖼️
It is also critical to choose the right embroidery design. The design I tried here had way too much dense filling in the solid wings and leaf. Dense fills place hundreds of tiny punctures in a tiny area, creating an incredibly heavy, stiff spot that distorts the yarn. Instead, choose light designs like redwork, line art, sketchy designs, or light bean-stitch patterns. Designs with open spaces and minimal satin stitching will sit beautifully on top of the crochet without overloading the yarn with thread.
I actually gave up on this specific idea since it really isn’t vital to the project. If the horse really needed the leaves on its rump, I would be figuring out the workaround patch method! If you have a very specific, dense design you absolutely must use, the safest route for the health of your crochet is to embroider it as a separate patch. You simply hoop a stable fabric like felt or canvas with your stabilizer, embroider the design completely, cut it out with a clean border, and then hand-sew or applique the finished patch onto your crochet piece. This gives you flawless machine precision without risking a single stitch of your handmade work. I have yet to completely master this method myself, but it won’t be long now. Never give up, never surrender!
Find craftedbytw on all the webs! https://linktr.ee/craftedbytw